Setup and Customize an ESPHome Web App Instance
Overview
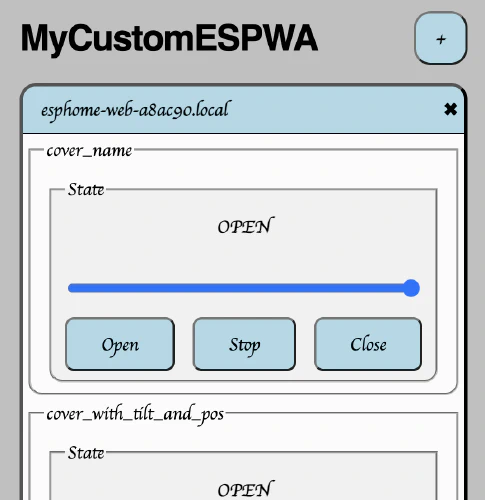
ESPHome Web App (ESPWA) is a Progressive Web App (PWA) designed to streamline the setup, configuration, and control of ESPHome-based microcontrollers independently, without requiring additional infrastructure like an ESPHome or Home Assistant instance.
For Makers seeking to offer customizable and user-friendly UI for their products, ESPHome Web App provides an accessible and customizable solution. It allows users unfamiliar with Home Assistant or ESPHome to interact with devices seamlessly without additional resources having to be diverted to app or other development.
Checkout the an active instance of ESPHome Web App at https://esplink.app as well as the Github repository.
Prerequisites
To customize and deploy your own instance of ESPHome Web App you will need a couple of prerequisites. I will not go into much detail regarding these prerequisites. There are lots of good resources out there to get you up to speed on these.
You will need the following software and tools:
- A shell of your choosing, e.g. zsh
- git
- npm
- A editor of your choosing, e.g. vim
- A webserver of your choosing, e.g. nginx
Setup
First obtain a copy of the source code by cloning the git repository and install ESPHome Web App's dependencies:
1git clone https://github.com/DanielBaulig/esphome-web-app
2cd esphome-web-app
3npm install
To locally test the instance use the Vite dev server
1npm run dev
Customization
ESPHome Web App makes it easy to customize the appearance and behavior of your ESPHome Web App instance.
To customize the behavior create a esphome-web.json file in the root directory.
1echo '{}' > esphome-web.json
Open the file with an editor of your choosing. There are a handful of configuration keys you can set to customize your instance. More customization options are coming with the upcoming release. And if there is anything that you are missing, please feel free to file an issue on the Github issue tracker.
title
You can set this key to a string of your choosing to change the title of your instance. Setting title will change both the caption on the top of the application as well as the HTML title attribute.
1{ "title": "MyESPWA" }
insecureOrigin
You can configure a custom insecureOrigin URL. The insecureOrigin URL is used to redirect browsers that do not allow for access to private network or mixed content origins from secure origins. For ESPHome Web App to work, it needs to be served via an insecure connection (i.e. http instead of https).
If no insecureOrigin config is set, ESPHome Web App will simply try to replace the https:// part of the URL with http://. However, most modern browsers will attempt to automatically upgrade connections from http:// to https:// and as such end up back on the secure origin.
To circumvent this behavior it might be neccesary to host the insecure origin on a domain / sub-domain that only serves the insecure version of the app (i.e. only http), such that an attempt at upgrading the connection will fail.
You can provide a fully qualified URL to your insecure version of the app using this configuration. Note that you do not actually need two instances of the code, but simply setup your webserver to serve the same application on two different origins.
1{ "insecureOrigin": "http://insecure.espwa.mydomain.com" }
css
If the css key is provided it must be an object containing CSS attribute overrides. The overrides are set on the body tag and can be used to override various aspects of the UI, primarily the used color scheme and/or font.
1{ "css": {
2  "--primary-background": "green",
3  "--primary-color": "purple",
4  "font-family": "cursive"
5} }
filters
Filters are a powerful feature that allows you to customize which entities are shown to your users and under which conditions. The latter part is important, since it allows you to implement custom workflows to meet your specific requirements.
filters is an array of filter rules that are applied to each entity before rendering it. If a filters condition is met, the entity is rendered. If none of the filters match the entity, it is not rendered. Note that by default, if the filters array is empty, all entities are rendered.
Each filter is a JSON object containing a type and depending on the filter type one or more additional keys.
Example
1{ "filters": [
2    { "type": "id", "value": "button-connect" },
3    { "type": "id", "value": "button-disconnect" },
4] }
There are 6 types of filters:
- id, for comparing against the ID of the entity
- rx, for comparing against the ID of the entity using a regular expression
- type, for comparing against the type of the entity
- state, for comparing against the state of a given entity
- and, for requiring all given filters to pass
- or, for requiring a single given filter to pass
id
The id filter type compares the value provided in the value key to the
entity's id.
Example
1{ "type": "id", "value": "button-connect" }
Note that this is the ID as provided by the ESPHome web_server event stream.
It is a combination of the id value provided in ESPHome and the type of the
entity, separated by a dash -.
A string with the id value can be used in place of the JSON object as a shorthand notation for the id filter.
Example
1{ "filters": [
2    "button-disconnect",
3    "button-connect"
4] }
rx
The rx filter type matches the regular expression provided in the value key
against the entity's id.
Example
1{ "type": "rx", "value": "my_entity[0-9]$" }
type
The type filter compares the provided value against the entity's type.
Example
1{ "type": "type", "value": "button" }
state
The state filter compares the provided state against a given entity's state.
Note that we are not comparing the provided state to the state of the entity the filter is applied to, but a given entity's state, This allows you to show or hide entities based on the state of other entities.
Example
1{ "type": "state", "entity": "binary_sensor-connected", "state": "ON" }
and
The and filter requires all sub-filters to pass.
Example
1{ "type": "and", "value": [
2    {"type": "id", "value": "button-connect"},
3    {"type": "state", "entity": "binary_sensor-connected", "state": "OFF"}
4] }
or
The or filter requires at least one of the sub-filters to pass.
Example
1{ "type": "or", "value": [
2    {"type": "id", "value": "button-connect"},
3    {"type": "id", "value": "button-disconnect"},
4] }
Note that the default behavior for entries in the filters array is or.
Mixed Content, Private Network Access and PNA Permission Dialog
As of today, most browsers prohibit mixed content on secure origins. What this means is that your secure origin website (i.e. served via HTTPS) cannot send requests to an insecure origin (i.e. the ESPHome web_server using HTTP).
Thankfully the most recent versions of Chrome come with an experimental technology called Private Network Access (PNA) and the PNA Permission Dialog. This gives the browser the ability to ask the user for permission to access hosts in the private network address space (e.g. 192.168.x.x) while relaxing the mixed content policy in return. This means our secure origin web app can freely talk to ESPHome web_server API devices on the local network.
However, since as of the time of writing, browsers not based on Chromium have not implemented this technology yet and even in Chrome it is still hidden behind a flag.
To enable this new behavior for your own instance of ESPHome Web App you will need to request and enable a Chrome Origin Trial token for the Private Network Access Permission Dialog.
Register for the Private Network Access Permission Prompt Trial and set the "pnaPermissionPromptToken" key
in the "originTrialTokens" map in your esphome-web.json file:
1{ "originTrialTokens": {
2    "pnaPermissionPromptToken": "<your token here>"
3} }
For users on browsers that do not yet support the relaxed mixed content policy through the PNA Permission Dialog, you will want to provide a non-secure origin fallback. Setup a subdomain that only serves a HTTP version of the application and set the insecureOrigin ESPHome Web App configuraiton key to point to that subdomain.
ESPHome Web App will redirect users to the inescure origin if it detects that it cannot send requests due to the mixed content policy.
To allow older versions of Chrome without the Permission Dialog to continue to
access private network hosts on the insecure origin, you will need to register
for the Private Network Access from non-secure contexts deprecation origin trial. Set the "pnaNonSecureToken" key in the "originTrialTokens" map in your esphome-web.json configuration file:
1{ "originTrialTokens": {
2    "pnaNonSecureToken": "<your token here>"
3} }
With both of these origin trials active you will be able to support the most browsers in the best way.
Build and deployment
Once you have customized your ESPHome Web App instance, it is time to build and deploy it.
Build it by running the following command:
1npm run build
This will generate a public/ folder that you will need to point your webserver at.